

Lately I've seen a lot of people asking for a tutorial on how to put the new
made to move barbie body on a pullip. So i made this simple tutorial to show you how.

Here are a list of things you'll need to do this:
2. A nail file, sandpaper or sanding block
3. Small screwdrivers
4. A hair dryer (optional)
5. A Pullip doll
6. Made to move barbie in the closest skin color to your doll. (I'm Using Made to move Andrea)

The first thing you'll want to do, is remove the wig on your pullip.
(I'm not going to show you how to do this here, but there are lots of resources and videos on
youtube on how to do this. just search "how to remove a pullip wig")

Then You're Going To Want To Open Her Up.
Find a small Phillips head Screwdriver and
remove the three screws on the back of her head.
(Be careful not to lose these!)

*I'm Using 5/64" Phillips head Screwdriver*

*I'm Using 5/64" Phillips head Screwdriver*


Open her, And remove the stock body by slipping it from the slot.
Now Put Her To The Side.
Now You'll Need your Made To Move Barbie.
(I'm Going To Show You How To Do This On A Different Doll.
So My Neck Peg Will Be A Different Color Than The Made To Move.)

Start By Taking The Head Off.
*This is where you may need to use a hair dryer, my doll didn't have very much glue, so i didn't do this. but holding a hair dryer on her head (do not get to close, you don't want to melt her) can loosen up that glue and make removing her head a lot easier.*

she has the same neck peg as the made to move barbies. just a different color)

Start by pulling her head up enough you can see part of the peg underneath
*don't pull to hard! you could break the peg!*
then take a tool like a screw driver or some other similar tool, I'm using my scissors.
carefully work your way around the peg loosening the vinyl around the peg

if you break the top part of the peg while doing this its ok.
we'll be cutting the top part off anyways.
The peg should look like this:
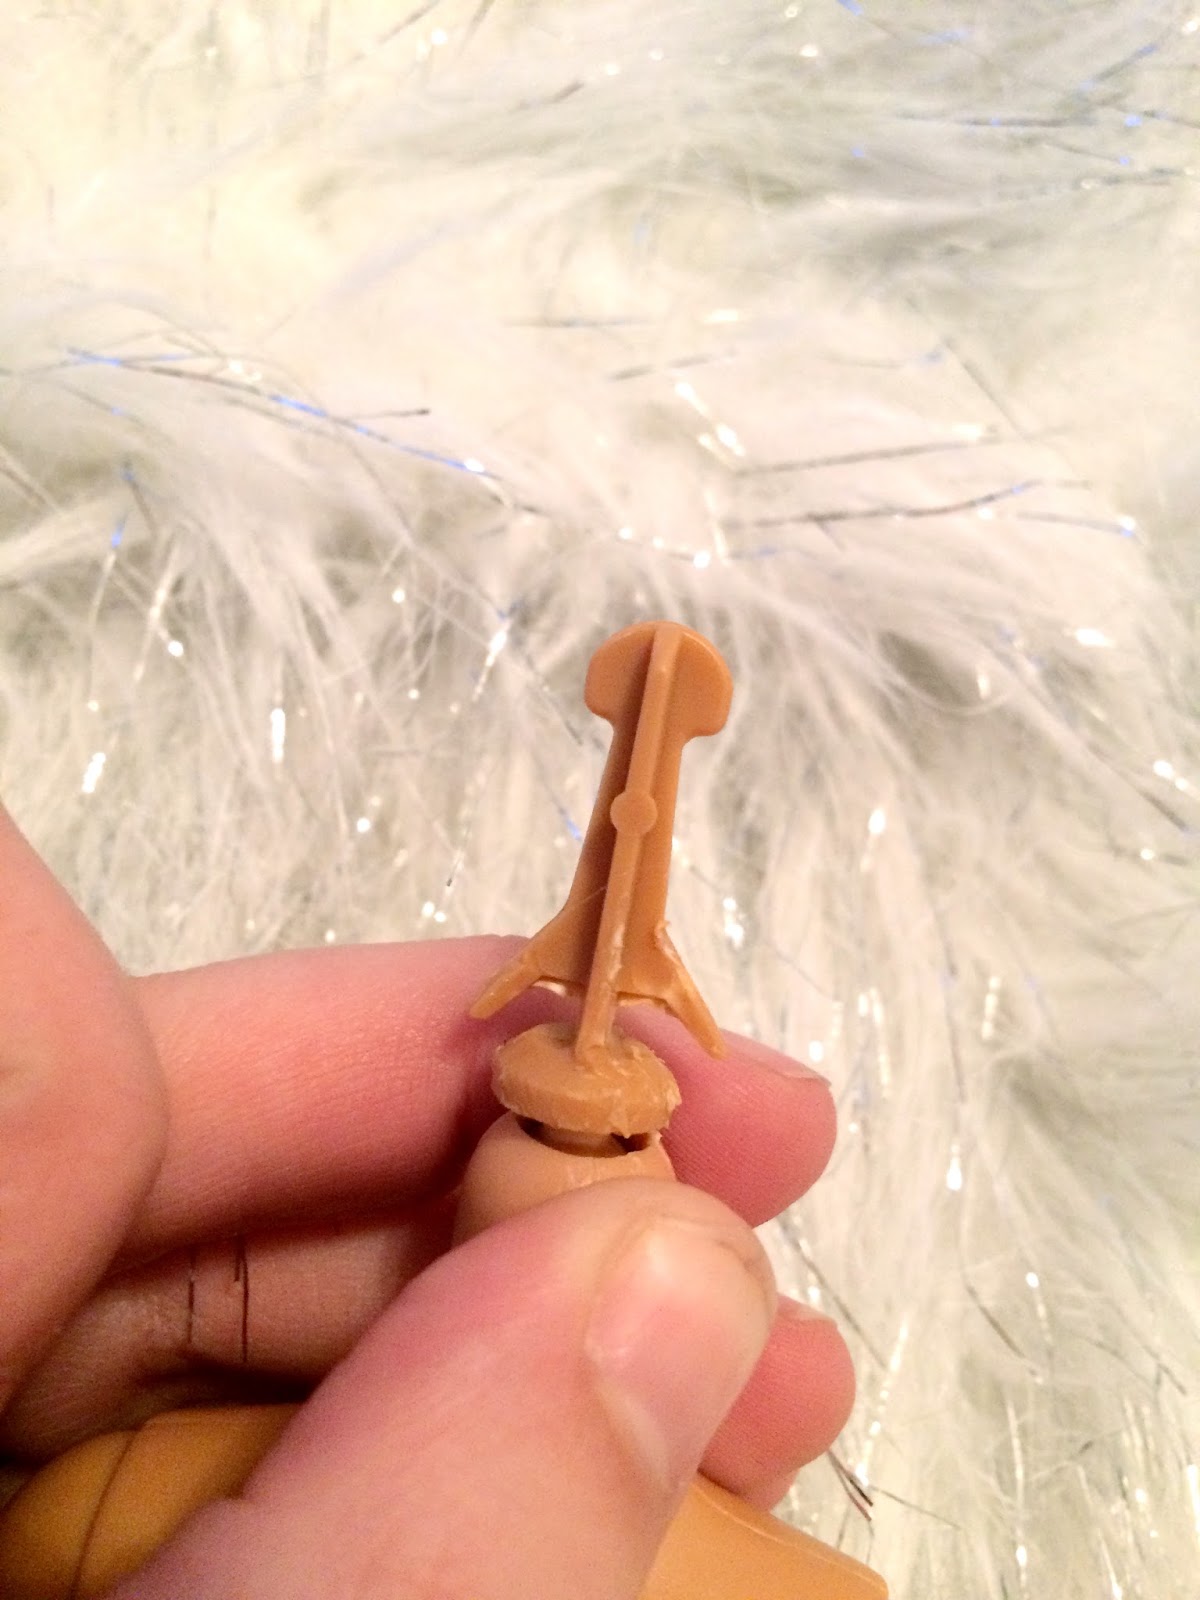
Now You're going to cut off the top of the peg. you can see where i cut it here:

You can use any good cutting tool to do this. i just used scissors.
*WARNING: always wear protective eyewear when doing these types of things.*

Next i cut off both sides of the peg because
it makes it easier to cut.

now that they're out of the way, you can get to this part:

now throw away those unwanted pieces of plastic.(:

cut so we're gonna sand it. (unless you're using a razor blade or x-acto knife, in that case you can cut it.)


I used a nail file because for the life of me i couldn't locate the
zillion pieces of sand paper we actually have.
*If you do use a nail file then this part could take a while... i watched project runway junior and half of a dance moms while i sanded mine. you'll want to make the peg smooth and flat.*
This is where you'll want to test it on your pullip doll to make sure it fits. I tested it a zillion times probably. You don't want it to be to loose but you want to clear the eye mech. I used the original Stock body's neck peg as a guideline.

This is how the neck peg should look on the made to move body after you've sanded/cut it.
Then Slide it into the slot under the eyemech on your pullip.
It may be a little tight so you'll have to push a little.
Line up the wink bars and screw her head back together.
Her head may seem like it doesn't fit together good but that should be corrected
When you screw it back on.
It may be a little tight so you'll have to push a little.
Line up the wink bars and screw her head back together.
Her head may seem like it doesn't fit together good but that should be corrected
When you screw it back on.


And TADA!!! :D


If you decide you want to put a barbie head back on this body then all you'll need to do
is take it off of your pullip and push a barbie head back on. (:


(on a side note, i love how pullip's huge head looks fine on her tiny body
but a barbie head looks too big. ROTFL XD)
